Step 1. Specify Search Criteria for Software Updates
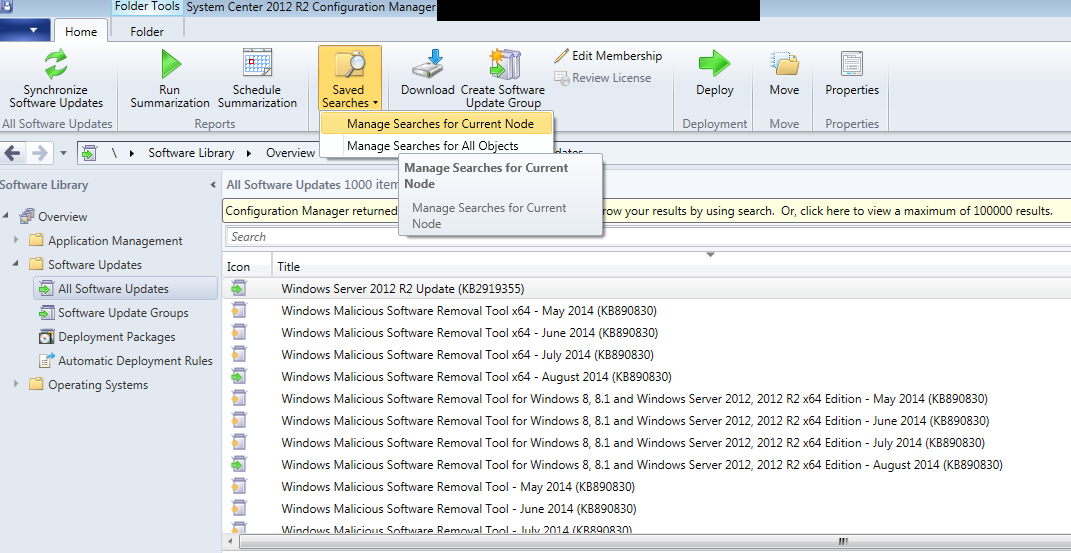
In the console, click Software Library, expand it and select All Software Updates then click on Saved Searches-Manage Searches for current Node
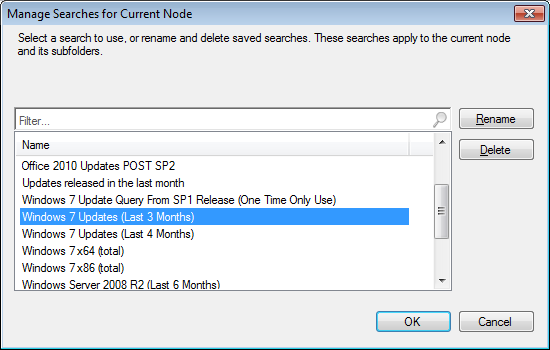
then choose the saved search ' Windows 7 Updates (Last 3 Months) and click OK
The Software Updates will be displayed, then choose IE updates and other non-relevant updates right click , select Properties and set the Custom severity to Low, click Apply and OK

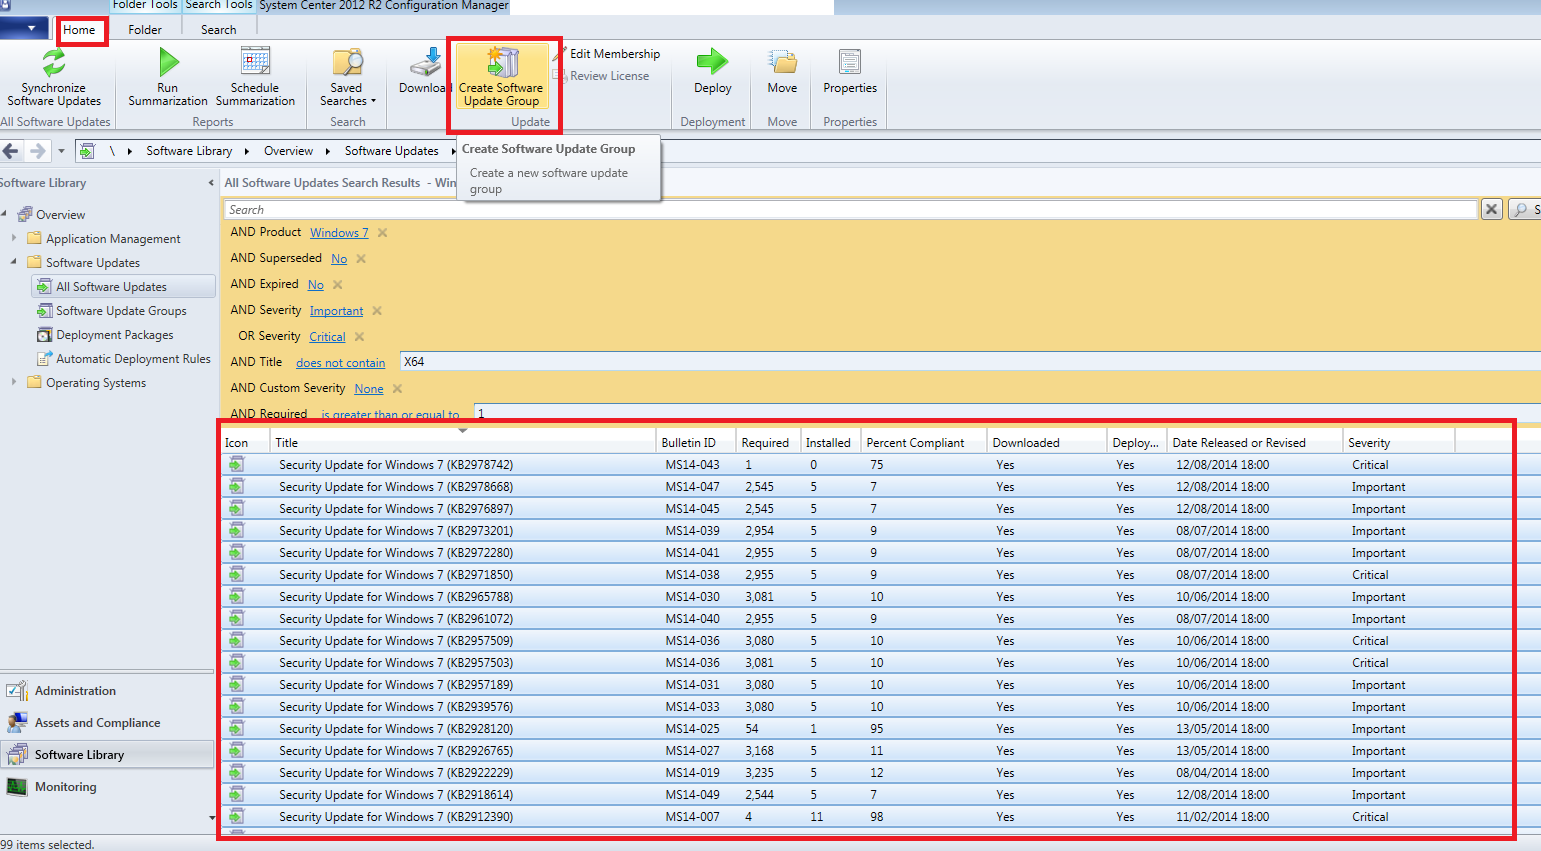
then define the criteria using the drop down menus beside each option
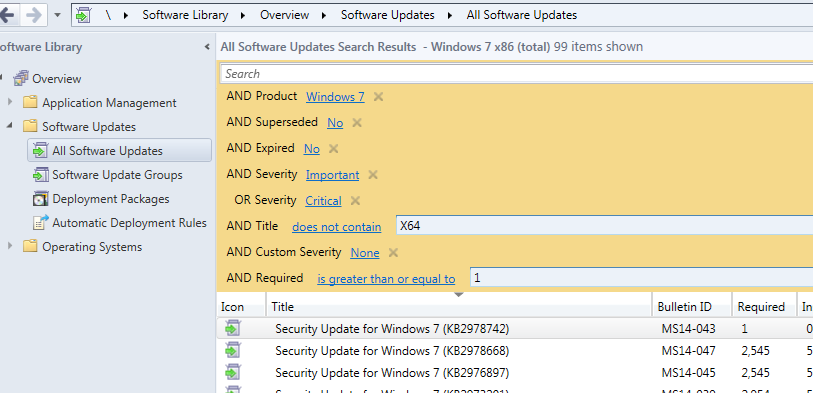
so that they look as follows:-
• Product = Windows 7
• Bulletin ID =MS
• Expired = No
• Superseded = No
• Severity = Important or Critical
• Title = does not contain x64 (for x32 bit Updates only)- change accordingly
• Custom Severity = None (to exclude IE updates and other non-relevant updates)
• Required = greater than or equal to 1
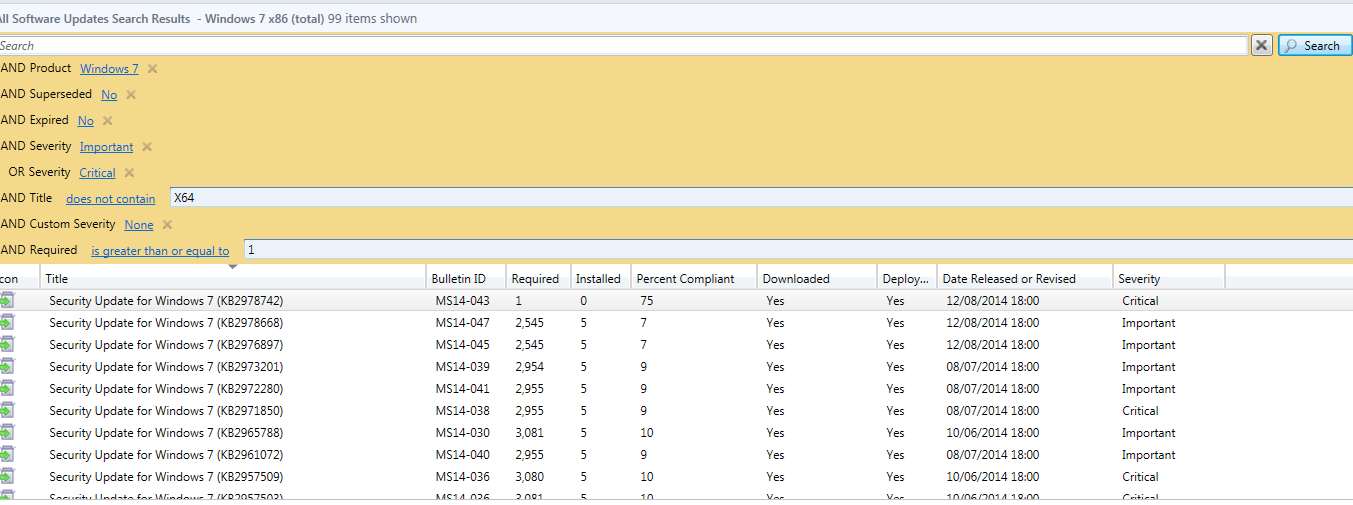
then click on Search, you'll get a list of results like so
Step 2. Create a Software Update Group that Contains the Software Updates
Note: Normally you'd want to look through all these updates and filter out (delete) the ones that are not applicable to you, such as Beta or Service Packs, Delete these from your list before continuing.
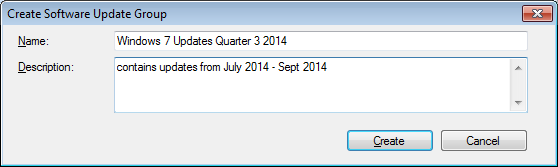
After we've trimmed down out updates , highlight the updates. click on Home and then in the Update click on Create Software Update Group
Name it Windows 7 Updates Quarter 3 2014 (depends on quarter) , enter Description on what updates it contains and click on Create.
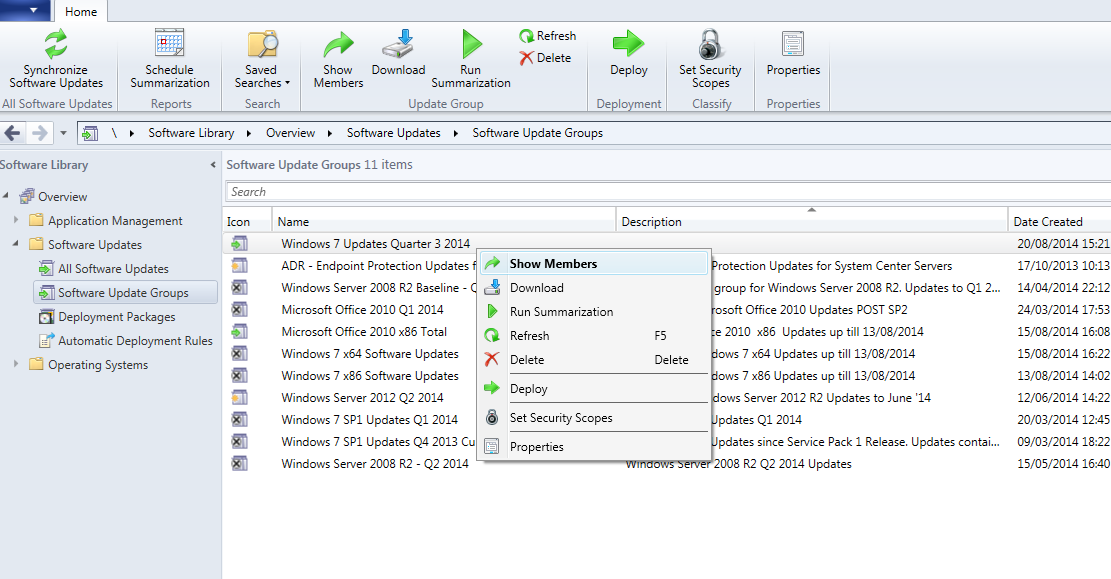
Now you can click on Software Update Groups in the console and you'll see your newly created Software Update Group, right click on it and choose Show Members to see the updates in this group.
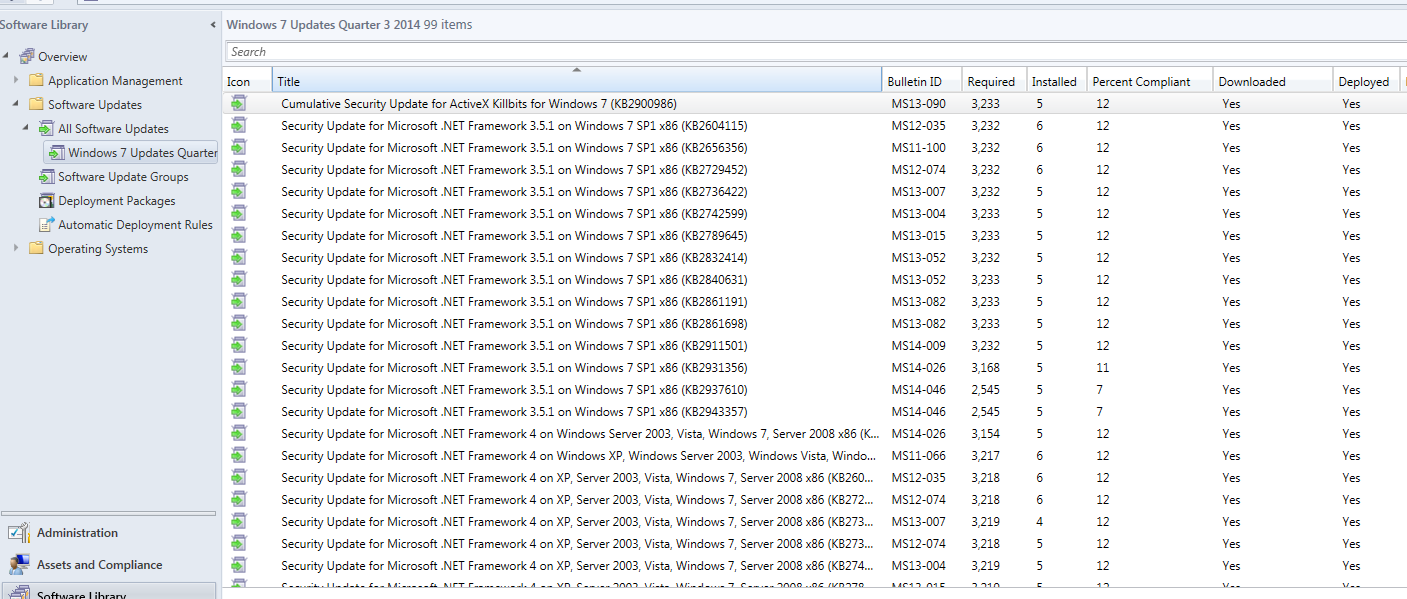
this lists the Sotware Updates contained in the Software Update Group
Step 3. Create Deployment Package (download updates)
Create a folder in below location, and give it a suitable name ex:- Q1 2014
\\servername\SoftwareUpdates\Workstations\Windows_Platforms\Windows-7\Microsoft\
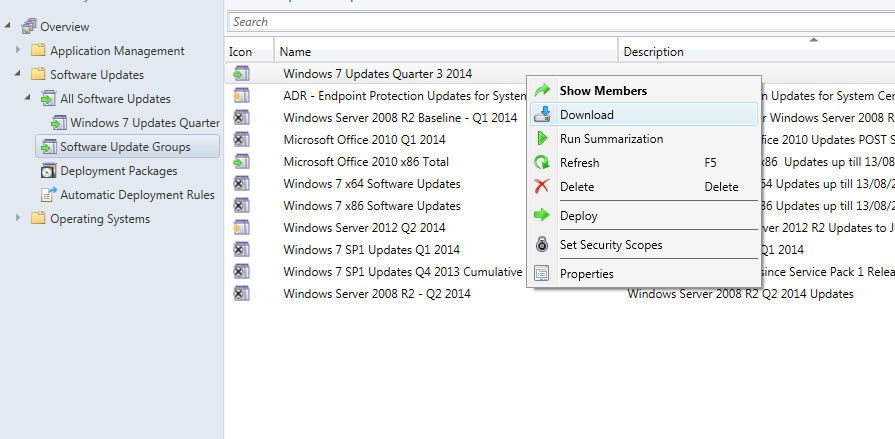
Now Click on Software Update Groups in the console right click on your newly created Software Update Group and choose Download.
Select 'Create a new deployment package an enter name, description and package source.
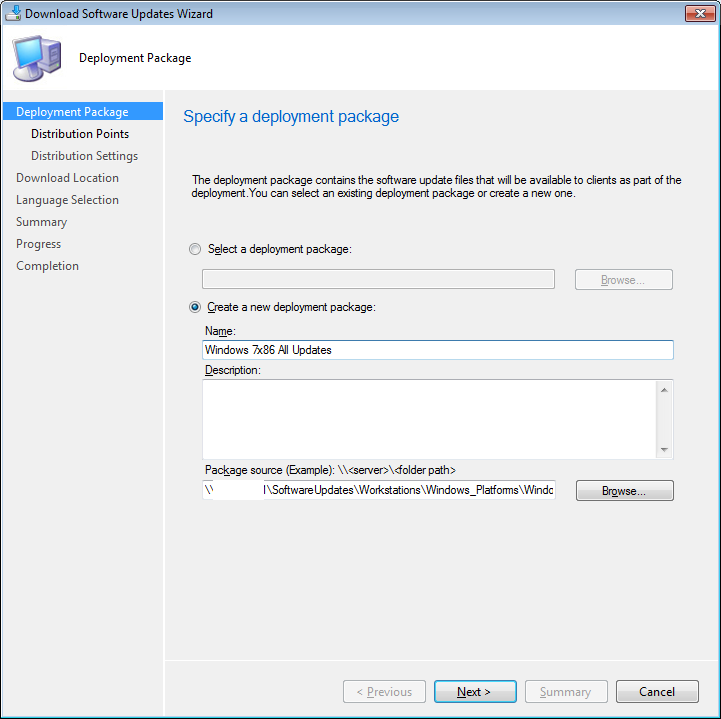
Choose Distribution Points and select Next till Finish.
Wait until the progress shows finished successfully.
Go to \\servername\SoftwareUpdates\Workstations\Windows_Platforms\Windows-7\Microsoft\ (folder name) and see if the updates are downloaded successfully
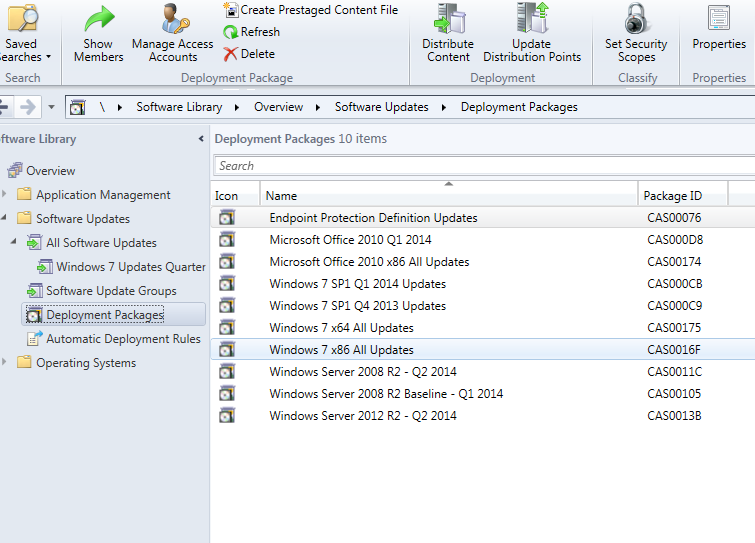
Now Click on Deployment packages and check your package has been created.
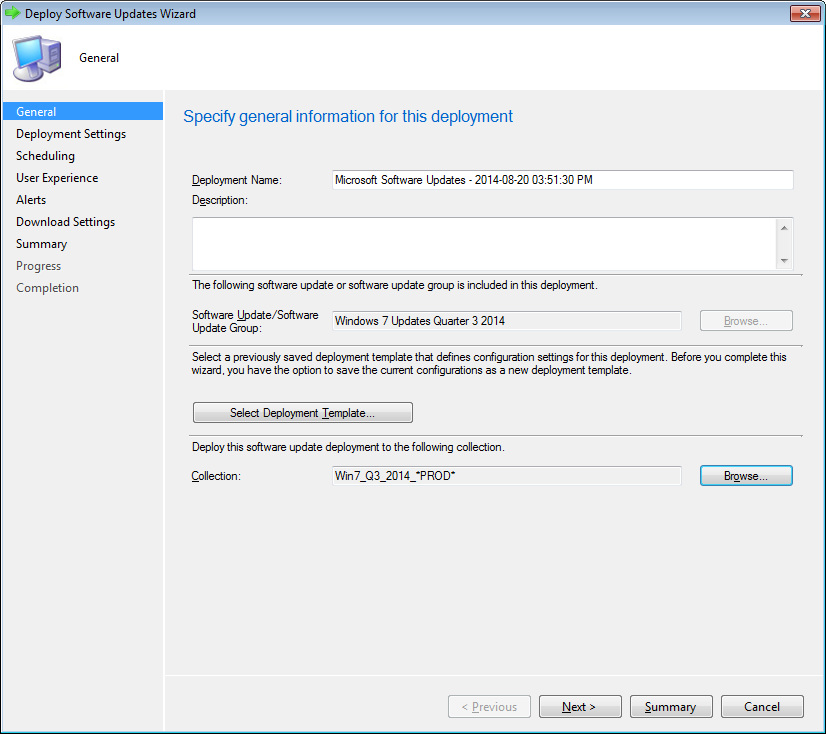
Step 4. Deploy the Software Update Group
Create a new collection in \Assets and Compliance\Overview\Device Collections\Software Updates\Workstations\OS Platform
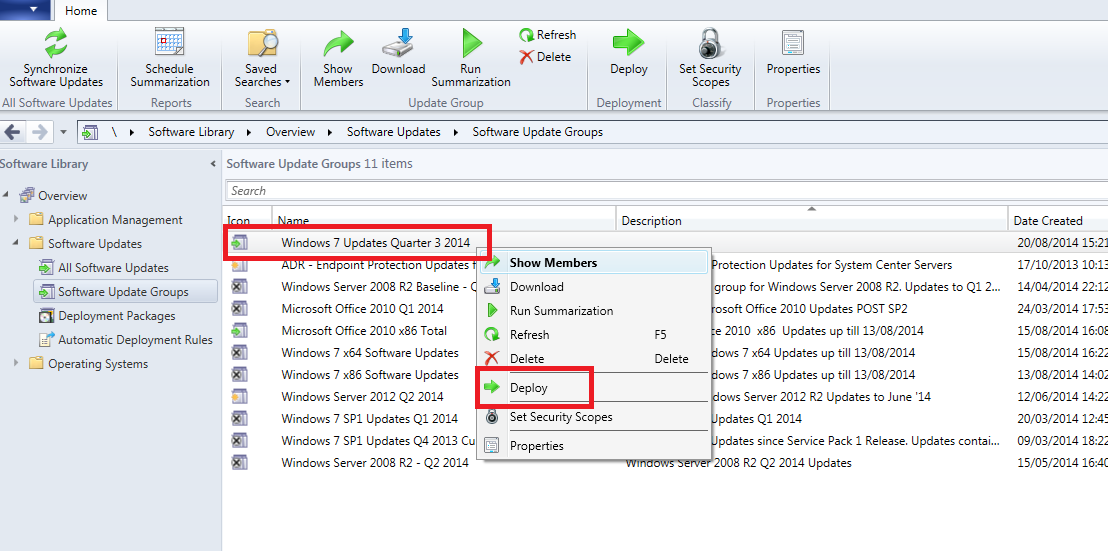
Select the Windows 7 Updates Software Update Group and in the Ribbon click on Deploy.
Give it a name and point it to a created collection.
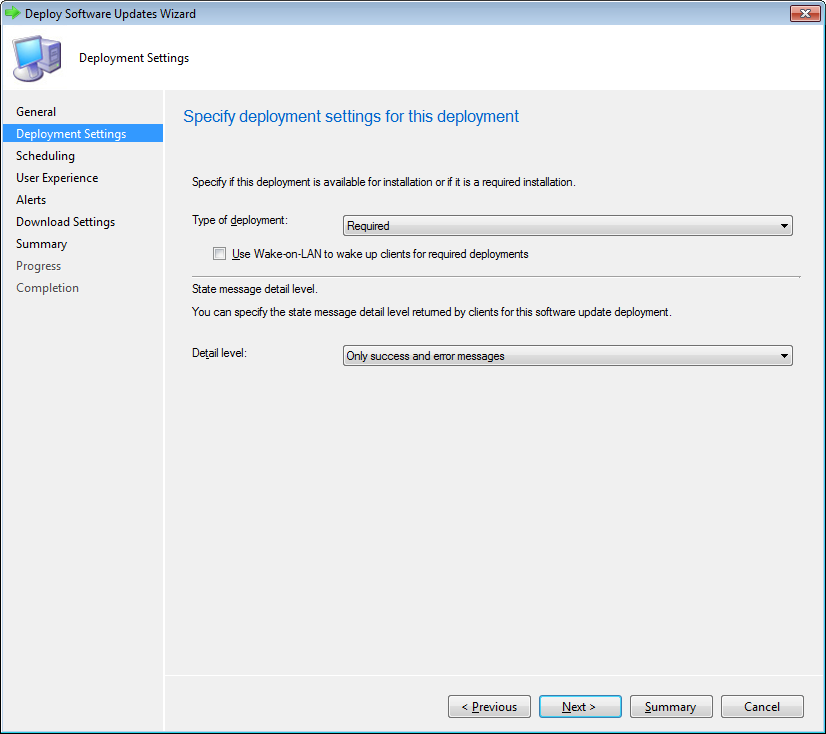
For Deployment Settings set the type of deployment to Required (mandatory) and State message level to Only success and error messages
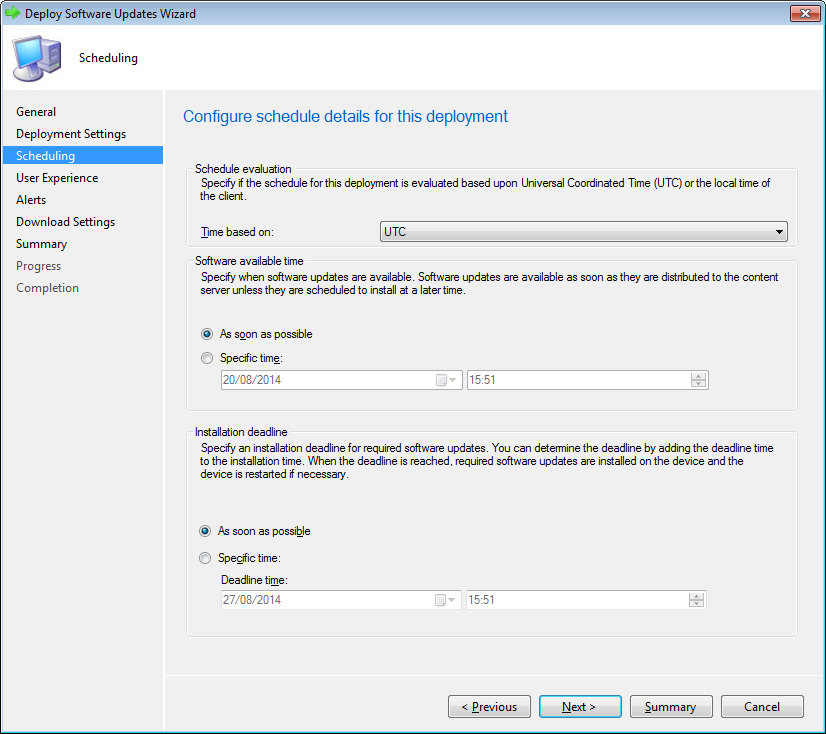
For scheduling set the Time Based on to UTC
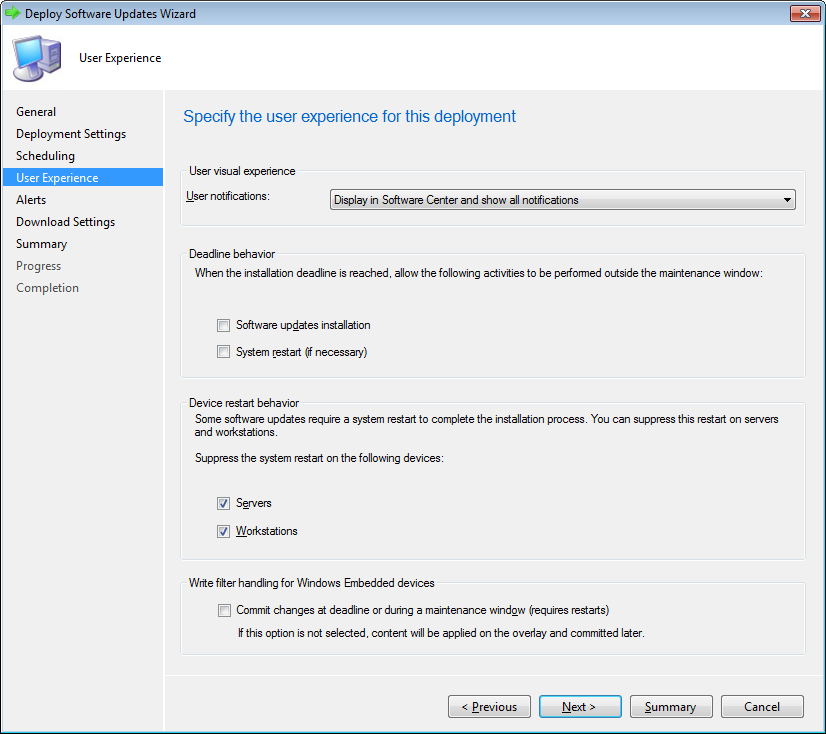
Supress restart for servers and workstations and then click next till Finish
No comments:
Post a Comment